
EmguCV 2.3 Application Programming : Manipulating the pixels
參考OpenCV 2 Computer Vision Application Programming Cookbook第二章
承接前一章內容
來做一些EmguCV上的簡單示範,主題如下:
Scanning an image with neighbor access
Performing simple image arithmetic
Defining regions of interest
Scanning an image with neighbor access
在影像處理中
通常會透過一些處理函式來對每一個pixel做更改
而這些函式往往都會參考這個pixel周邊鄰近的pixel
這些周邊鄰近的pixel可能包含了水平方向的前、後,或是垂直方向的上、下
舉一個簡單的例子:
銳利化
我們可以透過下列的算式達到銳利化的效果:
sharpened_pixel=5*current_pixel - left_pixel - right_pixel - up_pixel - down_pixel;
我們先以Gray色階來作範例
我們必須將原圖複製一份同等大小的空白影像(copy a blank image)
然後透過上述的運算取得值,在塞入那張空白影像
如下:
private Image<Gray, Byte>Sharpen(Image<Gray, Byte> image) { Image<Gray, Byte> result=image.CopyBlank(); //copy a blank image MIplImage MIpImg = (MIplImage)System.Runtime.InteropServices.Marshal.PtrToStructure(image.Ptr, typeof(MIplImage)); MIplImage MIpImgResult = (MIplImage)System.Runtime.InteropServices.Marshal.PtrToStructure(result.Ptr, typeof(MIplImage)); int imageHeight = MIpImg.height; int imageWidth = MIpImg.widthStep; unsafe { for (int height = 1; height < imageHeight - 1; height++) { //current_pixel line byte* currentPixel = (byte*)MIpImg.imageData+ *height; //up_pixel line byte* uplinePixel = currentPixel - MIpImg.widthStep; //down_pixel line byte* downlinePixel = currentPixel + MIpImg.widthStep; //result current_pixel line byte* resultPixel = (byte*)MIpImgResult.imageData+ imageWidth *height; for (int width = 1; width < imageWidth - 1; width++) { //5*current_pixel-left_pixel-right_pixel-up_pixel-down_pixel int sharpValue = 5 * currentPixel[width] - currentPixel[width - 1] - currentPixel[width + 1] - uplinePixel[width] - downlinePixel[width]; if (sharpValue < 0) sharpValue = 0; //Gray level 0~255 if (sharpValue > 255) sharpValue = 255; //Gray level 0~255 resultPixel[width] = (byte)sharpValue; } } } return result; } imageWidth
在第一層的for loop中,利用三個指標currentPixel、uplinePixel、downlinePixel
來分別表示
current_pixel的column、up_pixel的column、down_pixel的column
還要記得把運算的結果作判斷
判斷是否超過Gray level 為byte的範圍 0~255
測試的灰階影像處理時間約:6ms
結果如下:

要處理類似的方法時(需要去計算周邊鄰近的值做參考)
可以利用EmguCV提供的一個類別ConvolutionKernelF
可以看作是一個kernal matrix
然後影像可以直接對此matrix做運算
剛剛的銳利化的算式可以看成:

原理就是以矩陣中對應的pixel位置去做運算
以pixel的值乘以矩陣中的值,之後再將這九個(3X3)值相加
此矩陣就是current pixel乘以5,再減掉上、下、左、右的值
這時候程式就相對簡單很多
你只要專注在matrix的內容、他如何運算的並不需要知道
float[,] matrixKernel = new float[3, 3] {
{ 0,-1, 0 },
{-1, 5,-1 },
{ 0,-1, 0 }
};
ConvolutionKernelF matrix = new ConvolutionKernelF(matrixKernel);
由於在Convolution是屬於浮點運算
所以在result的Image是需要宣告成浮點深度(32bits)
若是直接將result存檔,或是利用Convert轉成8bits深度的影像
會變成這樣:

需要這樣的方式轉換,才會正常
Image<Bgr, Byte> BGRResult = result2.ConvertScale<byte>(1, 0);
也可以直接用EmguCV提供的OpenCV Invoke的方法:Filter2D
Image<Bgr, Byte>result = new Image<Bgr, Byte> (image.Width, image.Height); CvInvoke.cvFilter2D(image, result, matrix, new Point(0, 0));
result可以直接宣告成Image<Bgr,Byte>然後放到cvFilter2D的第二個引數
內部就會自動幫你轉換
出來的結果就會是正常的樣子!
銳利化後的結果!
Performing simple image arithmetic
EmguCV承襲了OpenCV上的功能
對於影像之間的運算
可以透過簡單的函式來處理
不必一個pixel一個pixel來計算
假設我們有image跟image2分別是兩張同等大小的影像
(一定要同等大小!!)
基本的運算有下列幾種:
//image3[i]=image[i]+image2[i]
image3 = image.Add(image2);

//image3[i]=image[i]+k
image3 = image.Add(new Gray(k));

//image3[i]=alpha*image[i]+beta*image2[i]+gamma
image3 = image.AddWeighted(image2, alpha, beta, gamma);

//if(mask[i]) image3[i]=image[i]+image2[i]
image3 = image.Add(image2, mask);
(在mask的部分一定得是Gray level的影像)
在AddWeighted裡的alpha、beta、gamma分別是double的型別
假設我們想將兩張圖疊加在一起
就能夠很簡單的用Add的方法來做
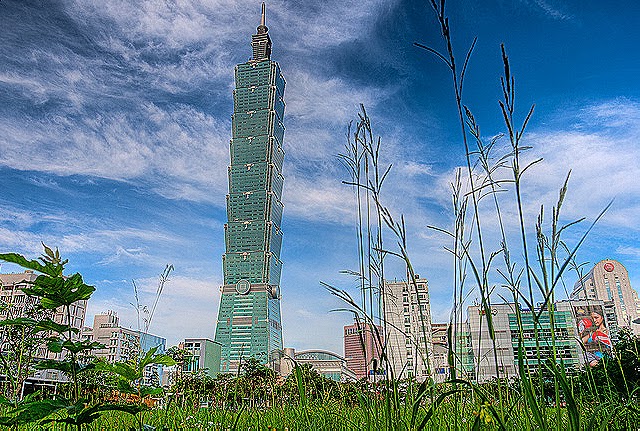
例如我們想將下面這張圖疊加到101的圖片上:

經過Add函式過後,就會變成下面這樣:

而更方便的是
EmguCV也有實作所謂的:Overloaded image operators
所以可以輕鬆地利用運算子來作運算:
image3 = image + image2;
image3 = 0.7 * image + 0.3 * image2;
image3 = image & mask;   //image mask
image3 = ~image;         //image inverse
EmguCV所複寫的運算子共有下列這些:
+ - * / & | ~
(加、減、乘、除、AND運算、OR運算、反向)
但這些運算的前提是
兩張的影像一定要一樣大喔!
也可以透過簡單的方法將影像的色域切割出來
並分別做運算處理
像是常用的RGB色域的影像
就能夠切割出各色域(色版)R、G、B的部分處理
例如我們想將剛剛的image2疊加到101的藍色色域上:
Image<Bgr, Byte>image = new Image<Bgr, Byte> (@"E:\101.jpg"); Image<Bgr, Byte> image2 = new Image<Bgr, Byte> (@"E:\image2.jpg"); Image [] imageChannels= image.Split(); //imageChannels[0] Blue,imageChannels[1] Green,imageChannels[2] Red imageChannels[0] = imageChannels[0] + image2; Image<Bgr, Byte> image3 = new Image<Bgr, Byte> (imageChannels);
利用Split()函式可以切割出三張影像
回傳的是一個影像的陣列、裡面包含Blue、Green、Red三色色域的影像
便可以分別對個別色域的影像作處理
最後再將這個影像陣列組成一張影像
結果如下:

Defining regions of interest
我們也可以定義影像中的限定的區域 ROI 來做處理
也就是局部的影像處理
但這裡的區域僅限矩形
透過設定這樣的區域,可以對此區域做處理,而不影像到其他區域
這樣就能夠加入不一樣大的影像進來做運算
例如我們想將下面這個logo影像加入就可以用此方法:
Image<Bgr, Byte>image = new Image<Bgr, Byte> (@"E:\101.jpg"); Image<Bgr, Byte> image2 = new Image<Bgr, Byte> (@"E:\logo.jpg"); image.ROI = new Rectangle(450, 300, image2.Width, image2.Height); image2.CopyTo(image); image.ROI = new Rectangle();
透過設定所要貼上logo的位置和區域
區域的大小一定要跟要貼上的影像一樣大
使用CopyTo()這個方法把影像貼上去
再把image的ROI恢復成初始即可
(否則影像就會變的跟logo一樣小)
但是這樣直接貼上的效果不好
如下圖所示:

於是在多加一行程式碼:
Image<Bgr, Byte>image = new Image<Bgr, Byte> (@"E:\101.jpg"); Image<Bgr, Byte> image2 = new Image<Bgr, Byte> (@"E:\logo.jpg"); image.ROI = new Rectangle(450, 300, image2.Width, image2.Height); image2 = image2 + image; image2.CopyTo(image); image.ROI = new Rectangle();
先讓logo的影像跟原圖的區塊相加
然後再貼到原圖上面去
這樣的效果就會好很多,如下所示:

當然,你也可以利用剛剛所學的運算方式
把image2 = image2 + image;
作一些調整,像是改變各個影像的權重等等
就能夠有所變化
可以自己試試看嚕~!!
沒有留言:
張貼留言