EmguCV 2.3 Application Programming : Processing Images with Classes
參考OpenCV 2 Computer Vision Application Programming Cookbook第三章
本篇介紹如下:
Using the Strategy design pattern in algorithm design
Using the Strategy design pattern in algorithm design
詳細關於Strategy design pattern可以看一下wiki
關於Stratagy design patern的目的就是將一種演算法封裝成一個類別
這個方法可以讓任何人輕易地更換已知的演算法
或是為了建立一個比較複雜的程式而串聯多個演算法
這個設計模式的好處就是
盡可能的隱藏開發演算法的複雜性
而透過一個直觀的介面來做控制
假設我們要開發一種演算法
需要傳入一張影像和一種顏色的值
然後輸出一張二值化的影像,表示這張傳入影像有哪幾個pixels是接近這種顏色
而再透過另一個參數來判斷接近這種顏色的依據
看起來好像很複雜,直接來看一下程式:
public class ColorDetector
{   //minimum acceptable distance
    private int _MinDist;
    //target color
    private Bgr _Color;
    //image containing resulting binary map
    private Image<Gray, Byte> _Result;
首先建立一個名為ColorDetector的類別
並使其擁有三個私有欄位:int _MinDist、Bgr _Color、Image<Gray,Byte> _Result
分別用來:設定比較依據、設定偵測的顏色、存放結果影像
這時候要定義ColorDetector的建構式
Strategy design pattern的目的就是要盡可能讓演算法的開發變得容易
所以我們需要簡單的建構式,能夠一開始就初始化所有參數
初始_MinDist為100、_Color為黑色,如下所示:
public ColorDetector()
{
    this._MinDist = 100;
    this._Color = new Bgr(0, 0, 0);
}
這時候要定義讓使用者設定參數的部分
在C#中我們不必另外提供方法讓使用者來用
直接利用屬性的get和set來實作
這裡要提供使用者可以設定兩個屬性MinDist、Color,如下所示:
/// Sets or gets the color distance threshold
/// Threshold must be positive,
/// otherwise distance threshold is set to 0.
public int MinDist
{
    get { return this._MinDist; }
    set {
        if (value < 0)
            this._MinDist = 0;
        else
            this._MinDist = value;
    }
}
/// Sets or gets the color to be detected
public Bgr Color
{
    get { return this._Color; }
    set{ this._Color = value; }
}
這樣就完成了基本的架構
接下來看ColorDetector的演算法該如何實作
/// Processes the color detection algorithm
/// inputs the image
/// output the result image
public Image<Gray, Byte> Process(Image<Bgr, Byte> image)
{
    //Same size as input image, but 1-channel
    this._Result = new Image<Gray, Byte>(image.Size);

    MIplImage MIpImg = image.MIplImage;
    MIplImage MIpImgResult = this._Result.MIplImage;

    int imageAllPixels = MIpImg.height * MIpImg.width;
    unsafe
    {
        byte* sourcePixel = (byte*)MIpImg.imageData;
        byte* resultPixel = (byte*)MIpImgResult.imageData;
        Bgr pixelColor;

        for (int pixel = 0; pixel < imageAllPixels; pixel++)
        {
            //process each pixel
            pixelColor = new Bgr(sourcePixel[0], sourcePixel[1],sourcePixel[2]);

            //compute distance from target color
            if (GetDistance(pixelColor, this._Color) < this._MinDist)
            {
                resultPixel[0] = (byte)255;
            }
            else
            {
                resultPixel[0] = (byte)0;
            }

            resultPixel++;
            sourcePixel += 3;
        }
    }
    return this._Result;
}
眼尖的朋友會發現取得陣列影像MIplImage的方法變簡單了
(因為也是最近才發現的~@@)
這裡的image就是傳入的來源影像,透過私有欄位_MinDist、_Color來做處理依據
這裡必須對每一個pixel都做處理
因此先計算所有pixel的數量
int imageAllPixels = MIpImg.height * MIpImg.width;
透過單個for loop來輪巡所有pixel
由於C#無法直接傳遞Byte*(指標)
所以這裡用一個變數Bgr pixelColor來裝BGR的值
然後傳給一個叫做GetDistance的方法,並回傳一個差值
這個差值若是比設定的_MinDist小,就認為這兩個顏色很接近
就將_Result上相對應位置的pixel設為255(白色)
反之則設為0(黑色)
而GetDistance的方法如下:
//computes the distance from target color
double GetDistance(Bgr sourcePixel, Bgr color)
{
    return Math.Abs(sourcePixel.Blue - color.Blue) +
           Math.Abs(sourcePixel.Green - color.Green) +
           Math.Abs(sourcePixel.Red - color.Red);
}
透過這個方法便可取得兩個顏色之間的絕對差值
並以此為根據來判斷
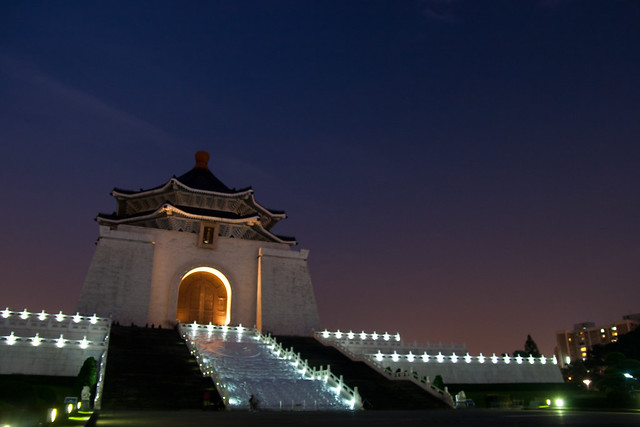
假設我們這裡傳入了封面這張中正紀念堂的圖
這張圖放置在E槽名稱為:chapter3.jpg
使用方式如下:
// 1. Read input image
Image<Bgr, Byte> image = new Image<Bgr, Byte>(@"E:\chapter3.jpg");
// 2. Create image processor object
ColorDetector colorDetector = new ColorDetector();
// 3. Set input parameters
colorDetector.Color = new Bgr(30,35,40);
// 4. Set the color distance threshold
colorDetector.MinDist = 80;
// 5. Process the image and save the result
Image<Gray, Byte> result = colorDetector.Process(image);
result.Save(@"E:\chapter3result.jpg");
使用者只需要直觀的五個步驟
把目標顏色設定是接近天空的暗藍色
就能夠在結果取出,如下圖所示:

而建築主體跟地面大多呈現黑色
透過這樣簡單的類別設計
就可以實作很多的影像演算法
並透過簡單的方式來達到使用目的
下一篇要介紹如何透過簡單的UI設計來實作這樣的功能
來吐一下標題...那個應該是 part3吧?
回覆刪除因為這是新的一章標題:Processing Image with Classes,所以又從part1開始~!!
回覆刪除